Installing and Running Manually
Prepare Environment
Install Prerequisites
First you need to install a number of packages with your OS package manager. The list of packages depends on the OS you use.
Ubuntu
sudo apt-get install python-pip python-dev \
  libmysqlclient-dev libpq-dev \
  libxml2-dev libxslt1-dev \
  libffi-dev
Fedora
Note
Fedora support wasn’t thoroughly tested. We do not guarantee that murano will work on Fedora.
sudo yum install gcc python-setuptools python-devel python-pip
CentOS
sudo yum install gcc python-setuptools python-devel
sudo easy_install pip
Install tox
sudo pip install tox
Install And Configure Database
Murano can use various database types on the back end. For development purposes SQLite is enough in most cases. For production installations you should use MySQL or PostgreSQL databases.
Warning
Although murano could use a PostgreSQL database on the back end, it wasn’t thoroughly tested and should be used with caution.
To use a MySQL database you should install it and create an empty database first:
apt-get install python-mysqldb mysql-server
mysql -u root -p

mysql> CREATE DATABASE murano;
mysql> GRANT ALL PRIVILEGES ON murano.* TO 'murano'@'localhost' \
    IDENTIFIED BY 'MURANO_DBPASS';
mysql> exit;
Install the API service and Engine
Create a folder which will hold all Murano components.
mkdir ~/muranoClone the murano git repository to the management server.
cd ~/murano
git clone git://git.openstack.org/openstack/murano
Set up the murano config file
Murano has a common config file for API and Engine services.
First, generate a sample configuration file, using tox
cd ~/murano/murano
tox -e genconfig
And make a copy of it for further modifications
cd ~/murano/murano/etc/murano
ln -s murano.conf.sample murano.conf
Edit murano.conf with your favorite editor. Below is an example which contains basic settings your are likely need to configure.
Note
The example below uses SQLite database. Edit [database] section if you want to use other database type.
[DEFAULT]
debug = true
verbose = true
rabbit_host = %RABBITMQ_SERVER_IP%
rabbit_userid = %RABBITMQ_USER%
rabbit_password = %RABBITMQ_PASSWORD%
rabbit_virtual_host = %RABBITMQ_SERVER_VIRTUAL_HOST%
driver = messagingv2

...

[database]
backend = sqlalchemy
connection = sqlite:///murano.sqlite

...

[keystone]
auth_url = 'http://%OPENSTACK_HOST_IP%:5000/v2.0'

...

[keystone_authtoken]
auth_uri = 'http://%OPENSTACK_HOST_IP%:5000/v2.0'
auth_host = '%OPENSTACK_HOST_IP%'
auth_port = 5000
auth_protocol = http
admin_tenant_name = %OPENSTACK_ADMIN_TENANT%
admin_user = %OPENSTACK_ADMIN_USER%
admin_password = %OPENSTACK_ADMIN_PASSWORD%

...

[murano]
url = http://%YOUR_HOST_IP%:8082

[rabbitmq]
host = %RABBITMQ_SERVER_IP%
login = %RABBITMQ_USER%
password = %RABBITMQ_PASSWORD%
virtual_host = %RABBITMQ_SERVER_VIRTUAL_HOST%

[networking]
default_dns = 8.8.8.8 # In case openstack neutron has no default
                      # DNS configured
Create a virtual environment and install Murano prerequisites. We will use tox for that. Virtual environment will be created under .tox directory.
cd ~/murano/murano
tox
Create database tables for Murano.
cd ~/murano/murano
tox -e venv -- murano-db-manage \
  --config-file ./etc/murano/murano.conf upgrade
Open a new console and launch Murano API. A separate terminal is required because the console will be locked by a running process.
cd ~/murano/murano
tox -e venv -- murano-api --config-file ./etc/murano/murano.conf
Import Core Murano Library.
cd ~/murano/murano
pushd ./meta/io.murano
zip -r ../../io.murano.zip *
popd
tox -e venv -- murano --murano-url http://localhost:8082 \
  package-import --is-public io.murano.zip
Open a new console and launch Murano Engine. A separate terminal is required because the console will be locked by a running process.
cd ~/murano/murano
tox -e venv -- murano-engine --config-file ./etc/murano/murano.conf
Register in Keystone
To make the murano API available to all OpenStack users, you need to register the Application Catalog service within the Identity service.
Add application-catalog service:
openstack service create --name murano --description "Application Catalog for OpenStack" application-catalogProvide an endpoint for that service:
openstack endpoint create --region RegionOne --publicurl http://<murano-ip>:8082 --internalurl http://<murano-ip>:8082 --adminurl http://<murano-ip>:8082 <MURANO-SERVICE-ID>where MURANO-SERVICE-ID is the unique service number that you can find in the openstack service create output.
Note
URLs (publicurl, internalurl and adminurl) may be different depending on your environment.
Install Murano Dashboard
Murano API & Engine services provide the core of Murano. However, your need a control plane to use it. This section describes how to install and run Murano Dashboard.
Clone the repository with Murano Dashboard.
cd ~/murano
git clone git://git.openstack.org/openstack/murano-dashboard
Clone horizon repository
git clone git://git.openstack.org/openstack/horizonCreate venv and install muranodashboard as editable module.
cd horizon
tox -e venv -- pip install -e ../murano-dashboard
Copy muranodashboard plugin file.
This step enables murano panel in horizon dashboard.
cp ../murano-dashboard/muranodashboard/local/_50_murano.py openstack_dashboard/local/enabled/Prepare local settings.
To get more information, check out official horizon documentation.
cp openstack_dashboard/local/local_settings.py.example openstack_dashboard/local/local_settings.pyCustomize local settings according to OpenStack installation.
...
ALLOWED_HOSTS = '*'

# Provide OpenStack Lab credentials
OPENSTACK_HOST = '%OPENSTACK_HOST_IP%'

...

# Set secret key to prevent it's generation
SECRET_KEY = 'random_string'

...

DEBUG_PROPAGATE_EXCEPTIONS = DEBUG
Also, it’s better to change default session backend from browser cookies to database to avoid issues with forms during creating applications:
...
DATABASES = {
    'default': {
    'ENGINE': 'django.db.backends.sqlite3',
    'NAME': 'murano-dashboard.sqlite',
    }
}

SESSION_ENGINE = 'django.contrib.sessions.backends.db'
If you do not plan to get murano service from keystone application catalog, provide where murano-api service is running:
...
MURANO_API_URL = 'http://localhost:8082'
Perform database synchronization.
Optional step. Needed in case you set up database as a session backend.
tox -e venv -- python manage.py migrate --noinputYou can reply ‘no’ since for development purpose separate user is not needed.
Run Django server at 127.0.0.1:8000 or provide different IP and PORT parameters.
tox -e venv -- python manage.py runserver <IP:PORT>Development server will be restarted automatically on every code change.
Open dashboard using url http://localhost:8000
Import Murano Applications
Applications need to be imported to fill the catalog. This can be done via the dashboard, and via CLI:
Clone the murano apps repository.
cd ~/murano
git clone git://git.openstack.org/openstack/murano-apps
Import every package you need from this repository, using the command below.
cd ~/murano/murano
pushd ../murano-apps/Docker/Applications/%APP-NAME%/package
zip -r ~/murano/murano/app.zip *
popd
tox -e venv -- murano --murano-url http://localhost:8082 package-import app.zip
Network Configuration
Murano may work in various networking environments and is capable to detect the current network configuration and choose the appropriate settings automatically. However, some additional actions are required to support advanced scenarios.
Nova network support
Nova Network is simplest networking solution, which has limited capabilities but is available on any OpenStack deployment without the need to deploy any additional components.
When a new Murano Environment is created, Murano checks if a dedicated networking service (i.e. Neutron) exists in the current OpenStack deployment. It relies on Keystone’s service catalog for that. If such a service is not present, Murano automatically falls back to Nova Network. No further configuration is needed in this case, all the VMs spawned by Murano will be joining the same Network.
Neutron support
If Neutron is installed, Murano enables its advanced networking features that give you ability to not care about configuring networks for your application.
By default it will create an isolated network for each environment and join all VMs needed by your application to that network. To install and configure application in just spawned virtual machine Murano also requires a router connected to the external network.
Automatic Neutron network configuration
To create router automatically, provide the following parameters in config file:
[networking]

external_network = %EXTERNAL_NETWORK_NAME%
router_name = %MURANO_ROUTER_NAME%
create_router = true
To figure out the name of the external network, perform the following command:
openstack network list --external
During the first deploy, required networks and router with specified name will be created and set up.
Manual neutron network configuration
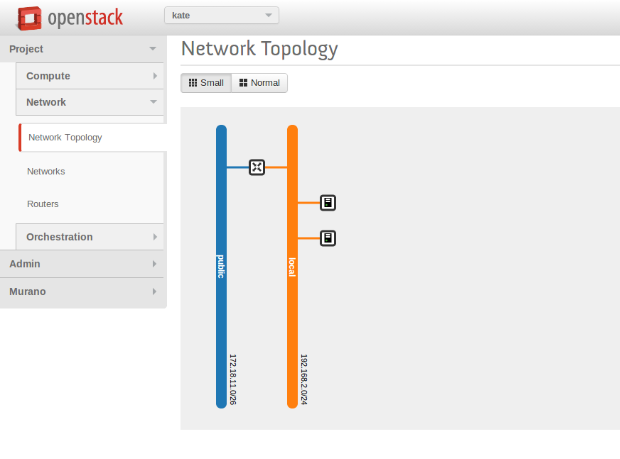
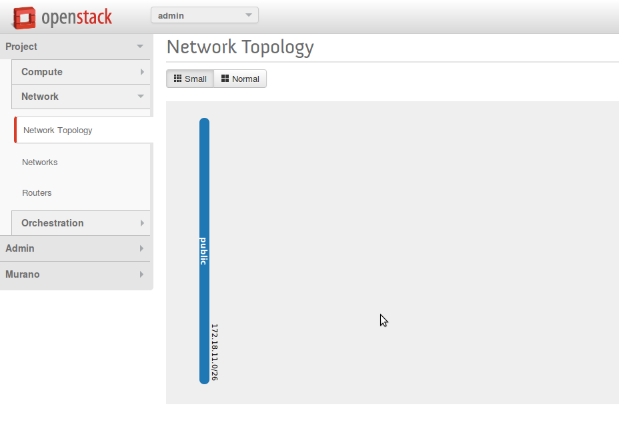
- Step 1. Create public network
- First, you need to check for existence of external networks. Login as admin and go to Project -> Network -> Network Topology. And check network type in network details at Admin -> Networks -> Network name page. The same action can be done via CLI by running openstack network list –external. To create new external network examine OpenStack documentation.
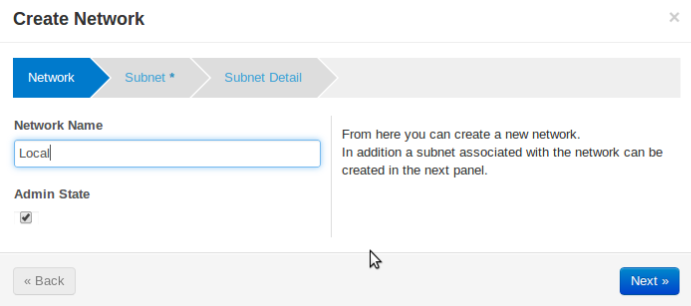
- Step 2. Create local network
- Go to Project -> Network -> Networks.
- Click Create Network and fill the form.

- Step 3. Create router
- Go to Project -> Network -> Routers
- Click “Create Router”
- In the “Router Name” field, enter the murano-default-router
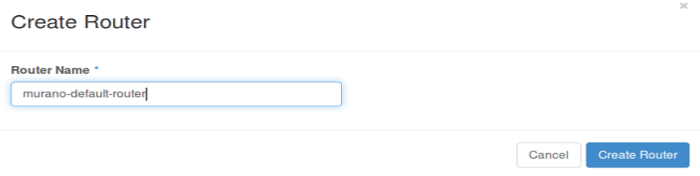
If you specify a name other than murano-default-router, it will be necessary to change the following settings in the config file:
[networking]

router_name = %SPECIFIED_NAME%
create_router = false
- Click on the specified router name
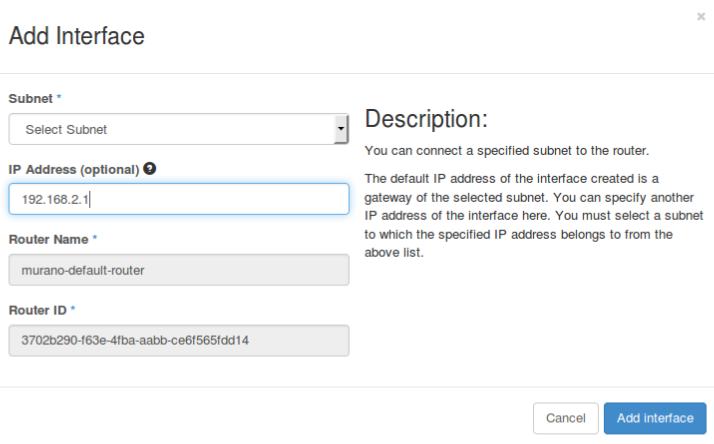
- In the opened view click “Add interface”
- Specify the subnet and IP address
And check the result in Network Topology tab.